

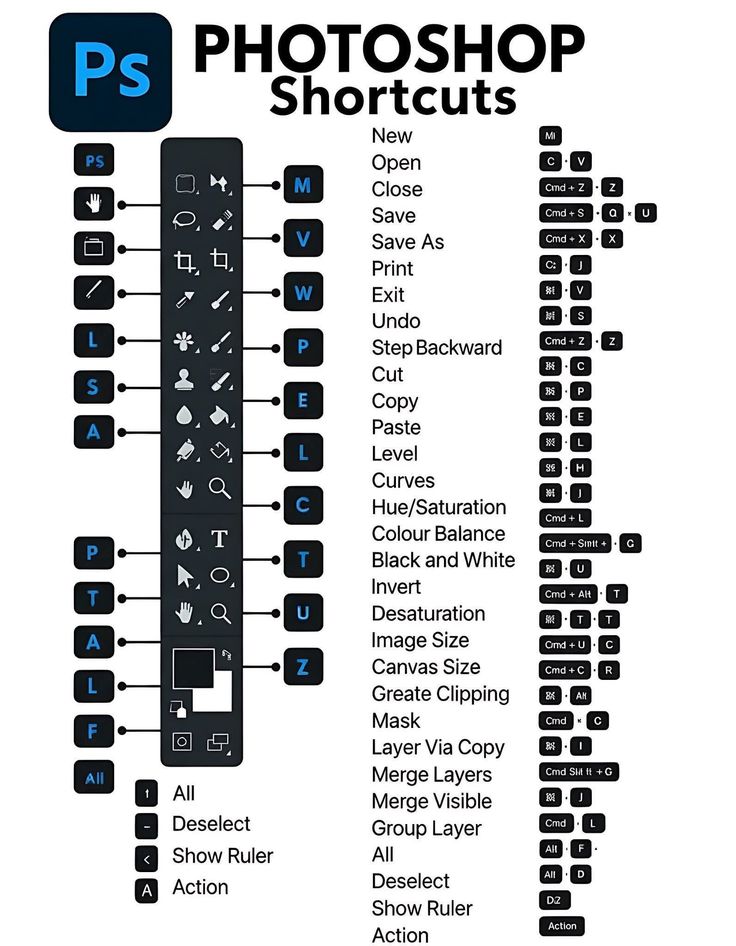
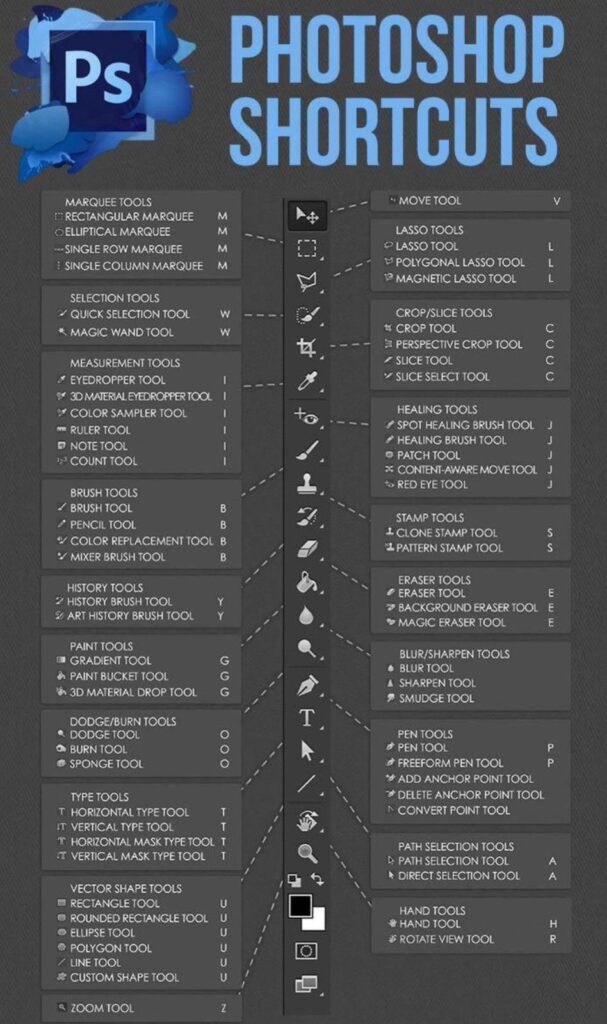
If you’re searching for a complete adobe photoshop tutorial to start your editing journey in 2026, you’re in the right place. This detailed beginner-friendly guide will walk you through everything — from understanding the interface to editing photos like a pro using the latest tools in Adobe Photoshop. here shortcut keys
Whether you want to edit photos for social media, design graphics, or start freelancing, this adobe photoshop tutorial will give you step-by-step instructions to master the basics quickly.
Why Learn Adobe Photoshop in 2026?
In 2026, Photoshop remains the industry-standard editing software for photographers, designers, and content creators. Learning through a structured adobe photoshop tutorial helps you:
- Enhance and retouch photos professionally
- Create social media graphics
- Design banners, posters, and thumbnails
- Start a freelance editing career
- Improve digital marketing visuals
Getting Started with This Adobe Photoshop Tutorial
Step 1: Install Adobe Photoshop
- Visit the official Adobe website.
- Download the latest version of Adobe Photoshop.
- Install and launch the software.
- Sign in with your Adobe account.
Once installed, open Photoshop and let’s explore the interface.
Understanding the Photoshop Interface
Before editing, every beginner needs this foundational adobe photoshop tutorial step.
Main Workspace Areas:
1. Menu Bar
Located at the top (File, Edit, Image, Layer, etc.)
2. Toolbar (Left Side)
Contains editing tools like:
- Move Tool
- Crop Tool
- Brush Tool
- Eraser Tool
- Clone Stamp Tool
- Text Tool
3. Layers Panel (Right Side)
This is the most important part of Photoshop. Every image element works in layers.
4. Properties Panel
Used for adjustments like brightness, contrast, color correction.
Adobe Photoshop Tutorial: Basic Editing Steps for Beginners
Step 2: Open an Image
- Click File > Open
- Select your image
- Click Open
Your image will appear in the workspace.
Step 3: Crop and Straighten Image
Using the Crop Tool
- Select the Crop Tool from the toolbar.
- Drag the edges to adjust framing.
- Press Enter to apply.
Pro Tip: Hold Shift to maintain aspect ratio.
Step 4: Adjust Brightness and Contrast
One of the most important parts of this adobe photoshop tutorial is learning adjustment layers.
Using Adjustment Layers (Recommended)
- Go to Layer > New Adjustment Layer > Brightness/Contrast
- Adjust sliders in the Properties panel.
- Click OK.
Why use adjustment layers?
Because they are non-destructive — you can edit anytime.
Step 5: Color Correction in Photoshop
Use Levels Tool
- Go to Layer > New Adjustment Layer > Levels
- Adjust shadows, midtones, highlights.
Use Color Balance
- Go to Layer > New Adjustment Layer > Color Balance
- Adjust cyan, magenta, yellow tones.
This step in the adobe photoshop tutorial helps make dull images vibrant.
Step 6: Remove Background (Beginner Method 2026)
Photoshop now includes AI-powered tools.
Method 1: Quick Action Remove Background
- Select your image layer.
- Go to Properties Panel
- Click Remove Background
Photoshop automatically removes it.
Method 2: Using Select Subject
- Click Select > Subject
- Then click Remove Background
Step 7: Use the Brush Tool
How to Use Brush Tool
- Select Brush Tool (B).
- Choose size from top bar.
- Select color.
- Paint on layer.
You can:
- Add highlights
- Draw graphics
- Create masks
Step 8: Use Clone Stamp Tool (Remove Objects)
This is a powerful tool covered in every advanced adobe photoshop tutorial.
- Select Clone Stamp Tool.
- Hold Alt and click clean area.
- Paint over unwanted object.
Perfect for:
- Removing pimples
- Removing wires
- Cleaning backgrounds
Step 9: Add Text in Photoshop
- Select Text Tool (T).
- Click on image.
- Type your text.
- Adjust font and size from top menu.
You can create:
- YouTube thumbnails
- Social media posts
- Posters
Step 10: Save Your Edited Image
For Social Media
File > Export > Export As > JPEG
For High Quality
File > Save As > PNG or PSD
Always save a PSD copy for future editing.
Beginner Photoshop Tips (2026 Edition)
This adobe photoshop tutorial would be incomplete without essential tips:
- Always work in layers
- Use adjustment layers instead of direct edits
- Use keyboard shortcuts (B = Brush, V = Move, T = Text)
- Zoom in for detailed edits (Ctrl + +)
- Keep original image untouched
Common Mistakes Beginners Make
- Editing directly on background layer
- Over-saturating colors
- Over-sharpening images
- Not organizing layers
- Ignoring resolution settings
Practice Project for Beginners
To master this adobe photoshop tutorial, try this:
- Open portrait image.
- Crop properly.
- Adjust brightness/contrast.
- Remove blemishes using Clone Stamp.
- Add text overlay.
- Export final image.
Repeat daily to improve skills.
One response to “Adobe Photoshop Tutorial for Beginners (2026 Guide)”
[…] Keys in Adobe Photoshop 2026: Boost Your Editing […]